I have done a lot of projects around the house, but this is by far the one I am most proud of. For many reasons:
- I was able to set a schedule, follow that schedule, and finish in the correct amount of time.
- I never had to back-out or undo anything.
- With the exception of 2 2x4 boards and some nails, I completely used all the supplies that I bought without any leftovers.
- The end results were what I had in mind from the start.
- Everything ended up level and perfectly measured, which are 2 things I tend to have problems with!
- It was physically draining lifting the shelves up in the air, so it's that much more rewarding.
- Storage space has become a problem for us, so having more is a HUGE plus in this house.
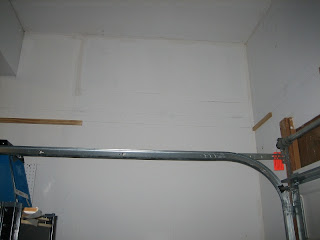
You can see the strips of wood that will hold up the shelves once I lift them up.
If you click the picture you can see the outline where the shelf will be along with marks for the studs so I don't have to think about where to screw the wood in. Having that already figured out is PRICELESS! Although I probably need to buy a stud finder, cuz using the tapping and nailing method wasn't wonderful.
Saturday was not as productive as I wanted it to be. I went running at the gym and ended up starting late at 10AM. We also were going to hang out with some friends that night, so I only had 5 hours to work with lunch in the middle. I really wanted to get both sides done, that way Sunday only entailed putting up the middle section. Unfortunately I left a little more than I wanted to, so this is as far as I got on Saturday.
It's got a thin 1/4 inch piece of plywood on the top. It doesn't need to be very thick because we aren't going to be putting anything heavy on these shelves. It's thick enough to handle light objects like empty coolers or Christmas decorations. The back is screwed into the studs and the strip on the left is shallowly screwed into the cross beam. I questioned how smart of a decision that was, but there are unused holes the construction crews left in the beam, so my little screws shouldn't do any more damage than those.
On Sunday I started at 8AM and worked until finishing around 7PM. I worked the ENTIRE day with the exception of a half hour for lunch and 20 minutes of going to Lowe's. Also instead of listening to music, I took the speaker from my computer and put it in the garage, and listened to 4 movies. Seriously made the time fly by!! I know I'm going to be sore tomorrow though. Here is some mid-day progress, this was probably around 4PM:
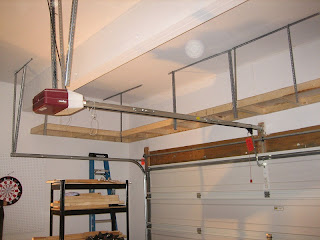
The metal strips on the top are screwed into the ceiling joists. The only other issue I had with this project is how much weight can the garage door handle? I decided since the front of the garage door is holding brick, which has to be a thousand times more heavy than my little 2x4's, then 50 pounds of wood wouldn't affect the structure at all.
So here are the pictures of the finished product. It ended up coming to 59 square feet of storage space. Music to my ears!!
And then one with the garage door opened, the final double-check to make sure I didn't just ruin our garage door. All clear!
Now starts the task of putting things up there. I can't wait to clear out space in the garage and make our guest bedroom livable again. It was space that went unused for years, but not anymore!! Even though this was a project for convenience and produced such simple results, it's definitely the project I am most proud of.


3 comments:
Wow that's an awesome job. I really need to do something like this in my garage.
I think the quarter inch plywood should be plenty strong, even for reasonably heavy things. What's the spacing between your 2x4s. It looks very solid.
By: Jacob on February 13, 2012 at 12:24 AM
I love this project. Not only does it solve a problem for you, but it was your vision, your design, your sweat equity from beginning to end. There are a few projects around our house that are like that for me -- they aren't the flashiest projects, but they're ones that make my life easier and I'm proud of them, too.
I'm sure you kept track of how much this project cost you. Care to share that info? Just curious. Maybe you did and I missed it. Seems like it was probably big impact for little dough.
Good work. I can't wait to see it in person soon!!!
By: Hillary on February 13, 2012 at 12:16 PM
I've been to Lowe's 3 times over the last 2 months, spending $246 total. I can't recall what I bought specifically for this project and what I bought for other household stuff. I guess I gotta assume it was all on this project. The most expensive parts were the metal strips at $10 a piece, and I used 12 of them!
By: Fulton on February 13, 2012 at 2:00 PM
Post a Comment